GetFeedback
Using Labels in Workspaces
Create labels, apply them to your survey responses, and organize them into groups to better analyze common types of feedback. Then close the loop by taking action with customers.
Labeling is available for Workspaces, a feature that lets you analyze survey feedback easily. It allows you to create labels to track product bugs, feature suggestions, or assign follow-up tasks to specific individuals or teams.
You can manage labels in the Label Manager, as well as add or remove labels in the responses side panel in Workspaces.
Using the Label Manager
In your account, go to Insights in the side navigation bar and select the Label Manager tab. From this page, you can create, edit, or delete labels.
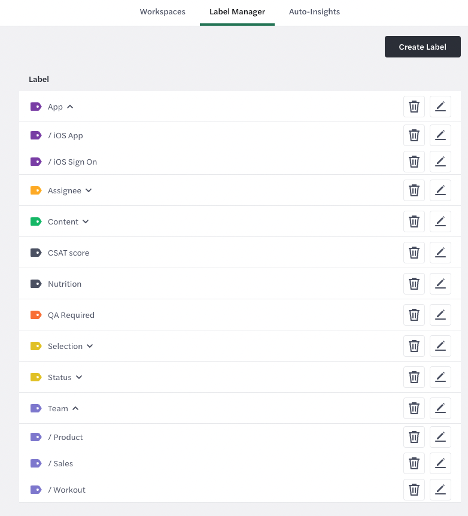
Creating Labels
To create a new label when in the Label Manager:
- Select Create Label.
- Enter a label name and color.
- Select Create label.
Optionally, you can add your new label to an existing group of labels. To do this, check the box to Add this label to a group and then select the group you want.
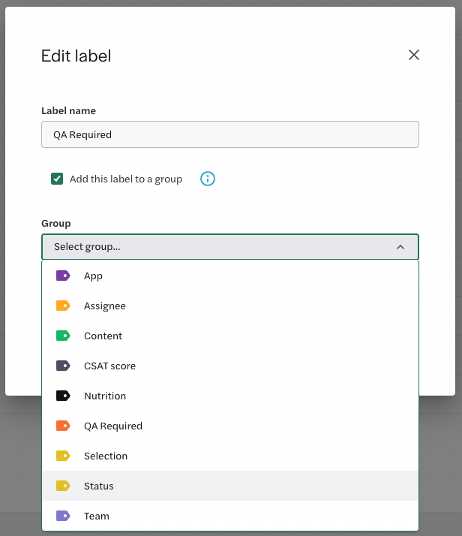
Editing Labels
To edit a label you’ve created:
- Select the pencil button across from the label you want to edit
- Edit the label name or color.
Note that for some labels, the option to add it to a group may be unavailable. This is because the label is already a group. (To ungroup them, edit each label associated with the group.)
Deleting Labels
Select the trash can button across from any label to delete it.
When deleting groups, you can choose whether or not to delete the grouped labels associated with them.
Using Labels in Workspaces
Go to Insights in the side navigation bar and select a workspace. (If you don’t already have one, you’ll need to create a workspace.)
Creating New Labels
To quickly create a new label within a workspace:
- Select a response from the responses side panel.
- Next to Labels in the full response, select the + button.
- Select Create label.
- Enter a label name and color.
- Select Create and apply label.
Optionally, you can add your new label to an existing group of labels. To do this, check the box to Add this label to a group and then select the group you want.
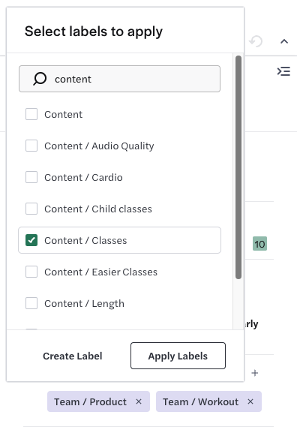
Applying Labels to Survey Responses
To apply a label you’ve already created to a response:
- Select a response from the responses side panel.
- Next to Labels in the full response, select the + button.
- Check the boxes next to the labels you want to apply.
- Select Apply labels.
Removing Labels from Survey Responses
To quickly remove a label from a response:
- Select a response from the responses side panel.
- Under Labels in the full response, select the X next to the label you want to remove.
Note that this action removes the label from the response for everyone in your company.
Filtering Results by Labels
To filter your workspace results by label(s) you’ve applied:
- Select Add filter at the top of your workspace.
- Select Labels from the dropdown.
- Set the conditions you want (ex: = Is any of (OR)).
- Search for and select the label(s) you want to include.
- Select Apply to filter your results.
You can remove a label filter at any time by hovering over the label criteria at the top of the page (next to Add filter) and selecting X.
Admins can select Save Filters at the top so that the applied filter criteria becomes the default view for the workspace. Team members can then remove filters to view other data while active in that workspace.