GetFeedback
Google Tag Manager (GTM) Integration
You can install GetFeedback Digital features on your site through Google Tag Manager (GTM).
Before You Start
You'll need 3 things to implement the button on your website through GTM:
- A GetFeedback combicode script, obtained by creating a button or from your Customer Success Manager
- A basic understanding of Google Tag Manager
- Access to Google Tag Manager
Creating your GetFeedback for Web Tag
To create your web tag:
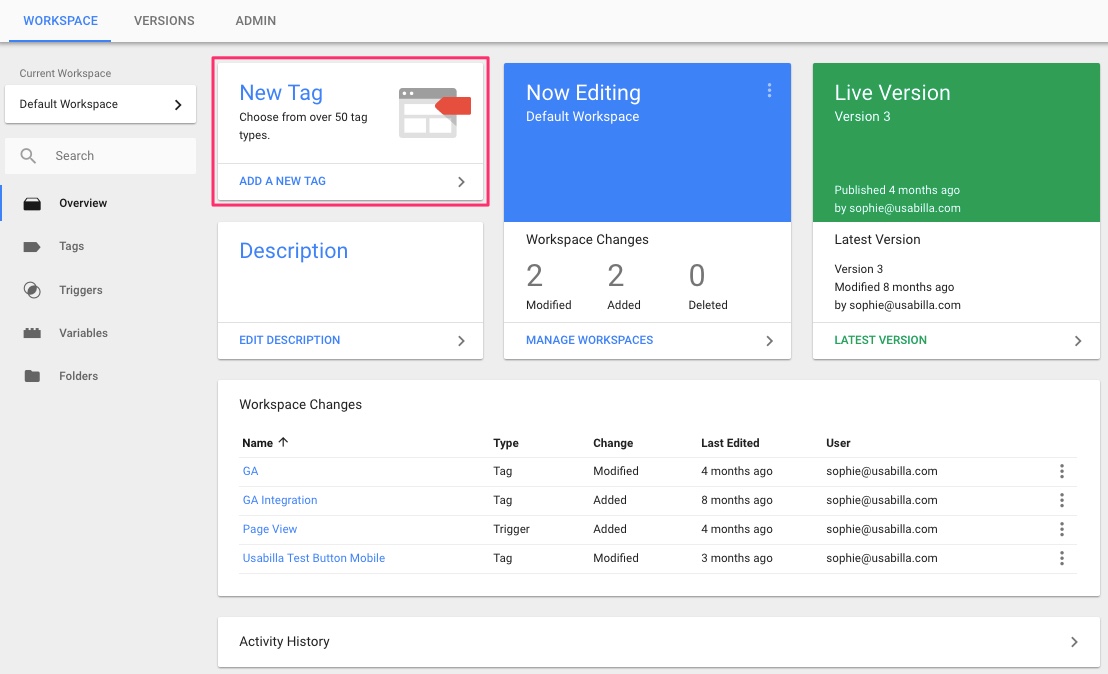
- Open Google Tag Manager. Navigate to the workspace for the page you want to implement GetFeedback for Web.
- Select New Tag.
- Name your tag, then select Tag configuration.
- Select the Custom HTML tag.
- Paste the GetFeedback combicode script in the input field. Insert the tag as HTML, including the opening (<script type="text/javascript">) and closing (</script) tags.
- Select the Support document write option directly below the input field.
Define triggers for your tag
To define your triggers:
- Select Triggering to define on which pages your tag should be shown. Make sure to use the "Window loaded" trigger type.
You can decide to show your tag on all pages of your website (recommended) or you can exclude certain pages from seeing a feedback button. If available, you can select an existing trigger for your GetFeedback Digital tag or you can create a new one. - Once you defined your tag triggering, it's time to save your tag and publish the changes to your container to publish the GetFeedback Digital feedback button on your web page.
Feedback button structure
After installing the GetFeedback for Web tag with GTM, you will be able to control the feedback buttons, forms, and surveys in your GetFeedback Digital account.
We recommend you install feedback buttons on your entire website, so they’re available when and wherever your visitors want to provide feedback.
Typically, our customers use one desktop feedback button and one mobile feedback button per domain website. These desktop and mobile buttons can be combined into one script. Simply reach out and we'll be happy to create the combined script for you.
If you need to exclude one or a few select pages from seeing the button, use one of our javascript API calls to make the button invisible. Learn more about our javascript API calls

Installing In-Page with GTM
Normally, when you install In-Page on your web page, you'll add a <div> tag that acts as a container for the In-Page widget. This logic stays the same when you're implementing In-Page through a tag manager. The only difference is we'll be inserting both the <div> container and the In-Page script using the tag manager.
Since you’ll be adding the In-Page <div> container with the tag manager, you’ll need a reference anchor on the page that the tag manager can use to add an In-Page <div> container to your page’s DOM tree.
The easiest way to do this is by adding an ID to the element to which you want to append the In-Page widget. For example, a <div> with the ID "usbl-inpage-anchor" in the footer of an article.
When you have your anchor ready, it's time to add In-Page to your tag manager.
You’ll do this by adding 2 tags to the tag manager: the Widget Code and the Script. The widget code is the placeholder <div> where the in-page widget will be injected. The In-Page script is the code that injects the In-Page widget into the container. Because of how In-Page works you'll always have 1 tag per In-page Widget Code and 1 In-Page tag per In-Page script. Ideally, you'll want to use 1 In-Page script per domain and use multiple In-Page widgets with that In-Page script.
First, we'll add the In-Page widget container in the tag manager. To do so in GTM go to the main page and click on "Add Tag". In the tag selection screen, select "Custom HTML Tag". Using the Custom HTML Tag allows us to define our tag.
In the first tag for adding the In-Page Widget container, we'll be adding a piece of JavaScript to search for the In-Page anchor and appends the In-Page Widget container to that element. The easiest way to do this is by using a jQuery function, alternatively, you can use vanillaJS. Below you'll find examples of both ways.

When you've added the code to the tag you'll need to make sure the "Support document.write" option is enabled and that the tag is fired once per event. If you've done this you can move on and make sure the triggering options are set correctly. The triggering options specify when the tag should be 'fired' and the code in the tag is run. Since we're appending the In-Page widget container to an existing web page we'll need to set the 'Firing triggers' rules in such a way that the trigger only fires when the page is fully loaded. To do so we create a new trigger with the trigger type set to "Page View". You can add additional rules for the trigger but for now just leave the trigger set to fire on every Page View.
Finish the first tag by saving both the tag as well as the trigger. You can save the tag as "usbl-inpage-container-tag" and the tag as "usbl-allpages-trigger". If you're planning to add a lot of different In-Page widgets, it's good practice to use the GTM folder feature.
The second step is to add the In-Page script for injecting the In-Page widget into the In-Page widget container. Just like before you'll add a new tag using the "Custom HTML Tag" template. In this tag, you'll add the <script> snippet from the installation page of your In-Page Widget.
When you've added the In-Page script tag you'll need to set triggering rules. Like the In-Page container tag, you’ll the rule to trigger on every Page View.
Finish up the second tag by saving it using a similar name to what you used earlier, like "usbl-inpage-script-tag".
After saving the second tag, we'll need to make a small adjustment to the settings of the first tag. What we'll need to do is set the Tag Sequencing. Tag Sequencing allows you to set a sequence of your tags. We need to enable this setting since the In-Page script code can only inject the In-Page widget when the In-Page container is already on the page. In the first tag go to Advanced Setting. In the Advanced Settings open the "Tag Sequencing" dropdown and check the "Fire a tag after usbl-inpage-container-tag fired". After you've checked this setting an additional dropdown will appear where you can select a "Cleanup Tag". In the dropdown, you'll need to select the tag that has the In-Page script that is associated with the In-Page Widget container that you're editing. In our example that would be "usbl-inpage-container-tag". To finish up the settings part tick the checkbox saying "Don't fire usbl-inpage-script-tag if usbl-inpage-container-tag fails". Doing so makes sure we're not running code when the container is not available.
Save your tags and triggers, then publish your workspace to see the results. The in-page widget should now be added to your web page using Google Tag Manager.
Advanced Usage
Using a tag manager for implementing In-Page provides you with a lot of flexibility. The reason is that Google Tag Manager allows you to change the In-Page widget on the fly or even change when the widget shows up, based on custom triggers. How this is done depends on your web page’s setup, like if you have a data layer or store parameters in the URL.
To get you started, we've made a short list of ideas:
- Changing the In-Page widget based on language
- Changing the In-Page widget based on platform
- Changing the In-Page widget based on browser
- Changing the In-Page widget based on customer type
- Hiding the In-Page widget based on language
Integrating GetFeedback with Google Analytics using GTM
You can also integrate GetFeedback button data into Google Analytics (GA) using Google Tag Manager’s (GTM) data layer. Learn more