SurveyMonkey
SurveyMonkey for Salesforce: Creating a Case Closed Survey
If you use our SurveyMonkey for Salesforce integration, you can set up a survey that gets sent to customers after someone closes a case in Salesforce. Learn more about the SurveyMonkey for Salesforce integration.
Automate your survey distribution to collect timely customer feedback and take action. You can use the Salesforce integration to send CSAT surveys after a customer interacts with your support team.
We'll use a CSAT survey in this example, but case closed workflows can work with other kinds of surveys, like Customer Effort Score (CES) or Net Promoter Score (NPS).
Create Your Survey
Create the survey you want to send when someone closes a case. Keep the following in mind:
- Start with a rating question, such as a Multiple Choice, Rating, or NPS question.
- To create a CSAT question, use a Multiple Choice or Matrix/Rating Scale question type with a 5-point scale.
- If you use a Multiple Choice question, enable scoring.
- If you use a Matrix/Rating Scale question, add weights to the answer choices.
- It's best to use 3-4 questions in your survey.
(Optional) Create Custom Objects and Fields in Salesforce
You can create a custom object in Salesforce to hold your survey responses. If you’re using our managed package or already have an object set up, skip this step.
When creating your custom object:
- Custom objects typically have a lookup relationship with a standard object. Lookup relationships are like a parent/child relationship between your custom survey object and any other standard or custom object in Salesforce. For example, you can create a lookup relationship between the custom CSAT Survey object and the Case object.
- Create a custom field for each survey answer you’ll map to the object. For example:
- Create a number field to hold the CSAT score.
- Create a text field to hold an open-text answer.
- Create a text field to hold the label for your CSAT question.
Set Up Salesforce Survey Mappings
In SurveyMonkey, create survey mappings to push responses to your custom Salesforce object. You can either:
- Use our managed package, which creates an object and mappings for you.
- Create your own mappings to a custom object.
To set up mappings:
- Open the Salesforce integration.
- Connect your survey to your Salesforce environment if you haven't already.
- Create your mappings. Learn more about creating mappings
Once you save your mappings and send your survey, we push any new survey responses to the Salesforce object you chose.
Add Custom Variables to Your Survey
Add the Case ID variable to your survey link to relate survey responses with the case. You can also add custom variables for other data you want to track. Learn how to add custom variables to your survey link.
Design an Email Template in Salesforce
Your case closed email is the main piece of the Salesforce flow. When your support agent closes a case, the flow sends the survey to the case contact.
There are a few ways to send a survey over email:
- Include your survey link in the body of a Salesforce email template in your outbound message.
- Create a SurveyMonkey Email Invitation and send your survey through Salesforce.
Create a Case Closed Flow in Salesforce
Once you create your email template in Salesforce, you can build the Salesforce flow. Use your outbound message in the flow to trigger your survey. Learn more about creating flows in Salesforce.
Set Conditions for your Case Closed Survey
If you send surveys after every case is closed, your customers may experience survey fatigue and stop responding to surveys. You can use conditions in your Salesforce flow to limit how often you send surveys.
For example, you can send the survey in the following conditions:
- Only for a certain number of cases (Example: every 6th case closed).
- Only after a period of time (Example: if the survey taker hasn't submitted a response in 7 days).
Only for Certain Number of Cases
You might want to trigger a survey for a certain number of cases only (Ex: every 4th case). To do this, you'll need to use formulas and workflow rules in Salesforce.
- Add an auto-number field to the Case object to assign each case a numeric value. To do this, add an auto-number field to the Case object. This field assigns each case a numeric value of {0}. Adding an auto-number field assigns a whole number to each case.
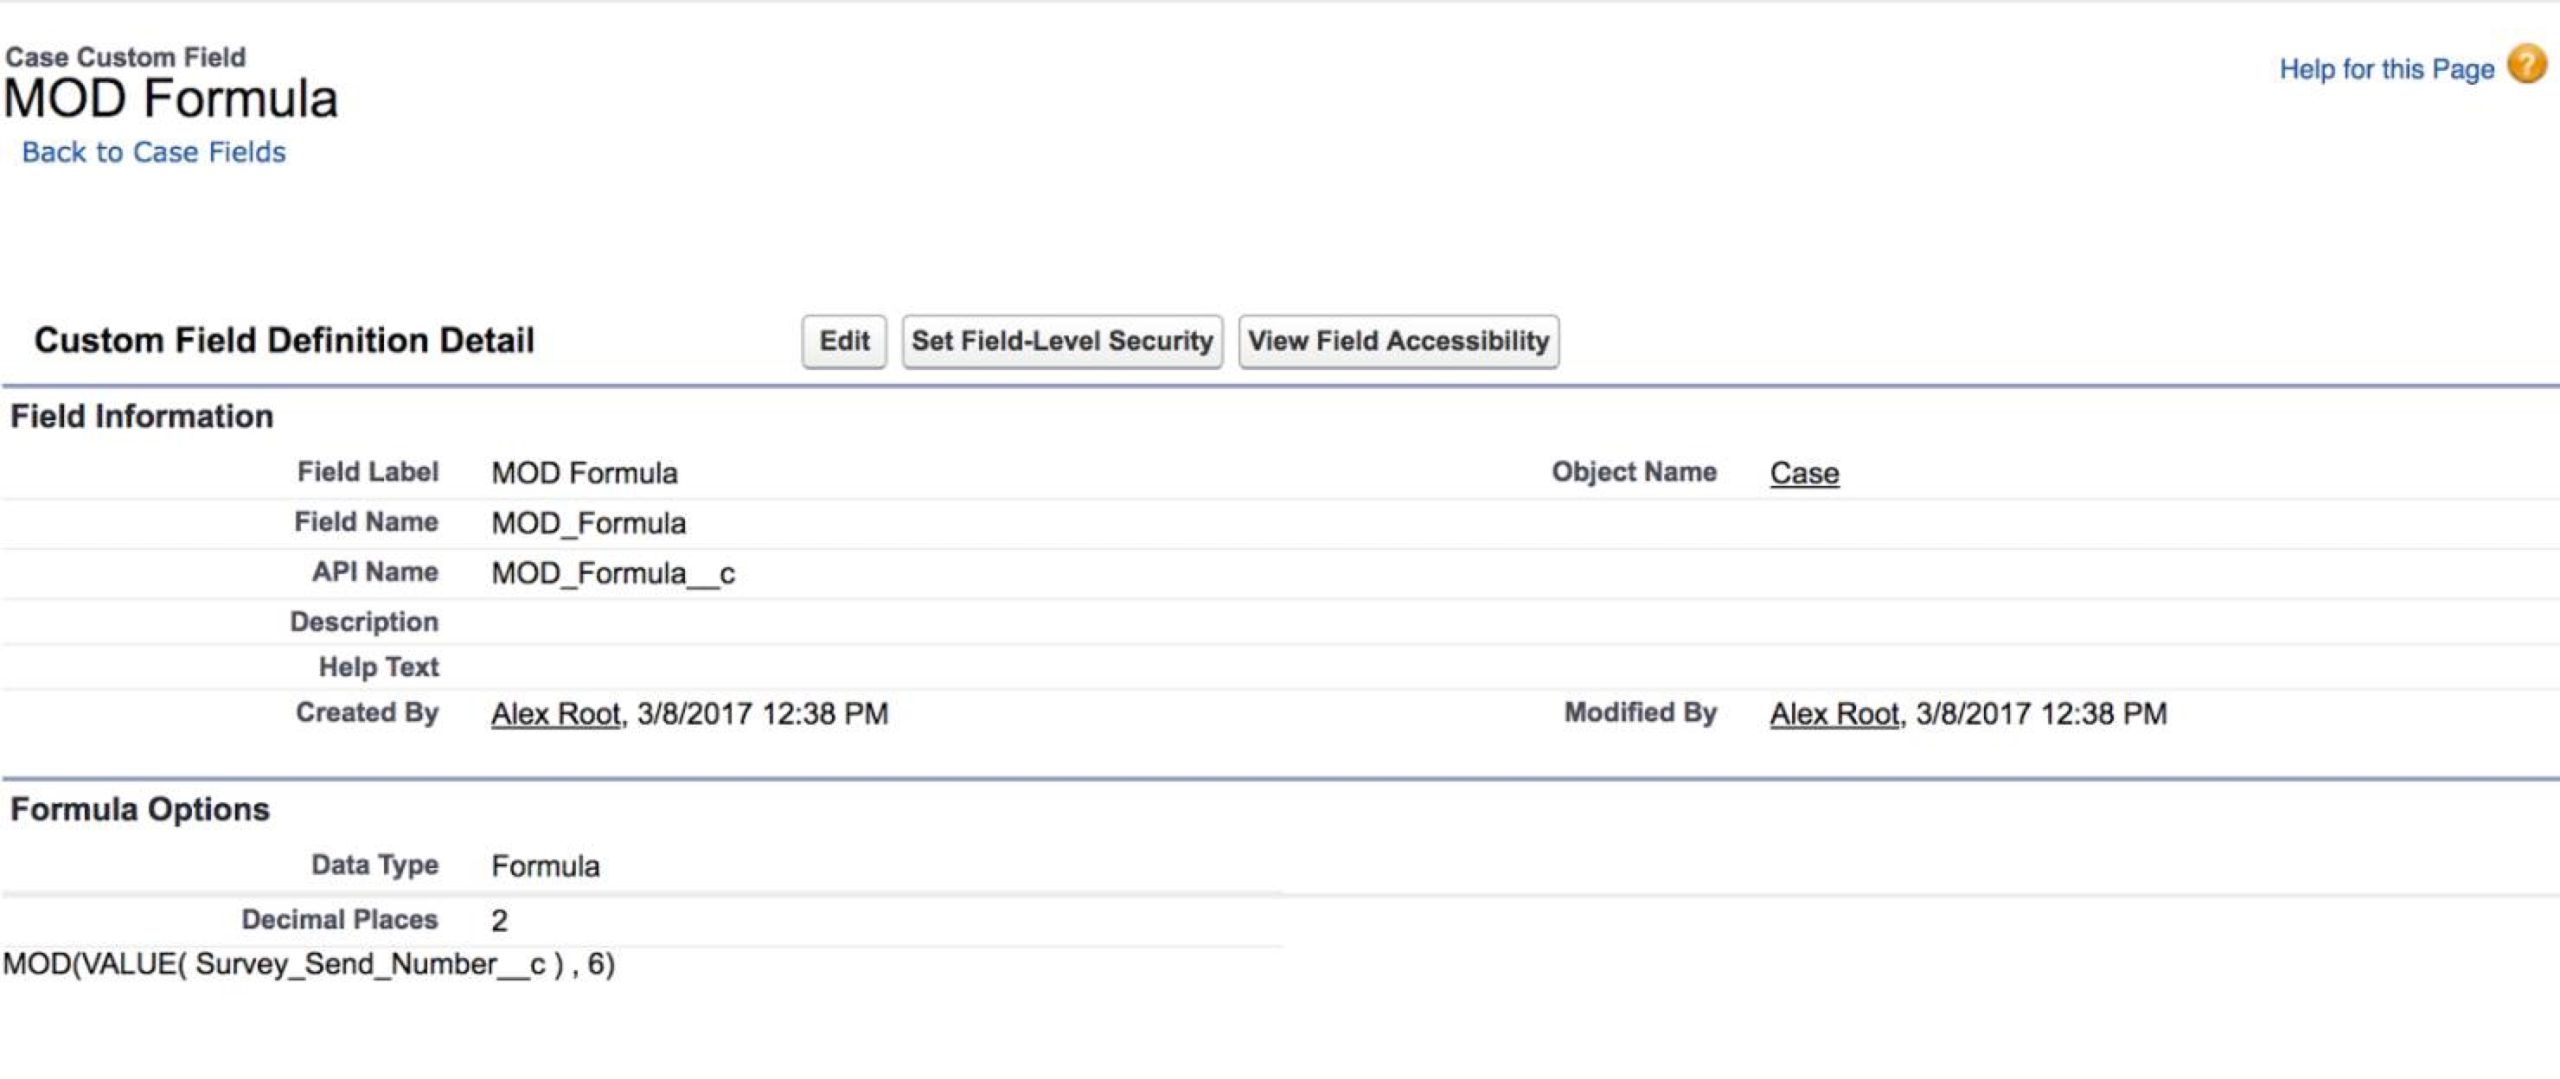
Use a Salesforce MOD formula to return the case number to 0 whenever it is divisible by 10. The end result will be a revolving set of numbers from 1-10 that resets to 0 whenever the case number hits 10.
The screenshot below shows a formula set up for our environment. The Survey_Send_Number__C field is the auto-number field we set up earlier. The 6 is the number to divide by. In this case, every 6th case will receive a survey. - Create a flow with a condition that sends the survey when that MOD formula equals 0 (which will only happen every 6th case). This will be our workflow rule criteria.
Only After Certain Time Periods
You can limit how often surveys are sent to individual respondents to only send a survey after someone hasn’t completed a survey for a certain time period. To do this, use custom mappings to map the Response Created Date or Response Modified Date attribute to Salesforce. The Completion Time attribute tells Salesforce when your recipient last completed a survey. Then, create a trigger in Salesforce to check the Completion Time before sending a survey.
To only send surveys after a certain time period:
- In Salesforce, create a date field on the Contact object.
- In SurveyMonkey, go to the Salesforce integration. Create a custom mapping to map Response Create or Response Modified to the date field on the Contact object.
- In Salesforce, create a trigger to distribute the survey based on these rules. The trigger needs to do 3 actions:
- Check the date on the contact for the case in question
- If the date is more than a certain time period (ex: 7 days) before the current date, send the survey. Otherwise, do nothing.
- If there is no date at all, send the survey.