GetFeedback
In-Page Widgets
In-page widgets integrate your survey directly in the content of your website. This allows you to gather very specific element or content-related feedback.
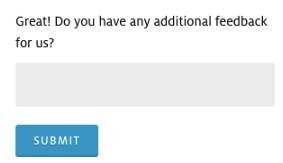
An In-Page widget looks like this:

After selecting YES (or NO), your visitor will be asked to explain their answer in an open text field:
You can customize these options to work best on your website.
Setting up In-Page Widgets (app.usabilla.com)
In-Page widgets in app.usabilla.com have 2 parts: a widget and a script.
- The widget is the embedded survey your visitors will get to see.
- The script makes sure the widget can be shown on a website. Scripts also allow you to group multiple widgets. For example, use different scripts for each of your websites or different scripts for each of your departments.
If you don’t have access to In-Page, contact your Customer Success Manager.
- In app.usabilla.com, go to the In-Page Widgets section and select Setup.
- Select New widget.
- Name your widget.
- Select an existing script to install the widget on or add a new script.
- After this, you’ll be presented with all of the In-Page options we offer. There are quite a lot of options, so take your time to familiarize yourself with the product. You could, for example, only ask ‘Did you find this useful’ and then use the ending page or add different follow-up questions.
Implementing an In-Page Widget
Now that you have a shiny, new In-Page widget, you’ll want to use it of course. To implement the widget, you'll have to add two pieces of code to your web page. We will start by adding the Javascript code and finish with the code for the widget itself.
To implement an in-page widget:
- In app.usabilla.com, find your widget, then select the install icon.
- Copy the code under Script snippet.
- Paste the code into the bottom of every page you want the widget to appear, just before the closing body tag (</body>).
- In app.usabilla.com, go back to the Install page for your widget.
- Copy the code under Widget code.

- Paste the code in the section of the HTML where the widget should appear. You will have to do this on every page you want the widget to appear.
Make sure that the HTML container for the widget is defined before you execute the script. If you're using a Tag Management system, make sure that the firing rules are set correctly. Execute the HTML container first, then execute the script.
Adding Multiple Widgets to a Page
When you’re running a website that is content heavy, In-Page can provide valuable feedback that is directly related to the content on the page. Content on your website can come in a wide variety of formats like blog posts, articles, customer support pages. More specifically, we’ve found that adding In-Page to your FAQ page can help gather feedback on your content and identify improvements.
Many FAQ web pages will use expandable content for hiding and showing the answers to the questions. This means that the answer to each question is hidden for the user until they expand the content. By doing so you provide your users with an overview of all questions. While you could add a single In-Page widget to your FAQ web page, you could also add multiple In-Page widgets. If you add an In-Page widget to each FAQ question you can gather feedback for each individual question.
In this article, we explain step-by-step how you can automatically add multiple In-Page widgets to a single page and how you can automatically add contextual custom variables to each In-Page widget on your web page. For this step-by-step guide, it’s advised that you’re familiar with In-Page, HTML, CSS, JavaScript, and Tag Management.
Setup
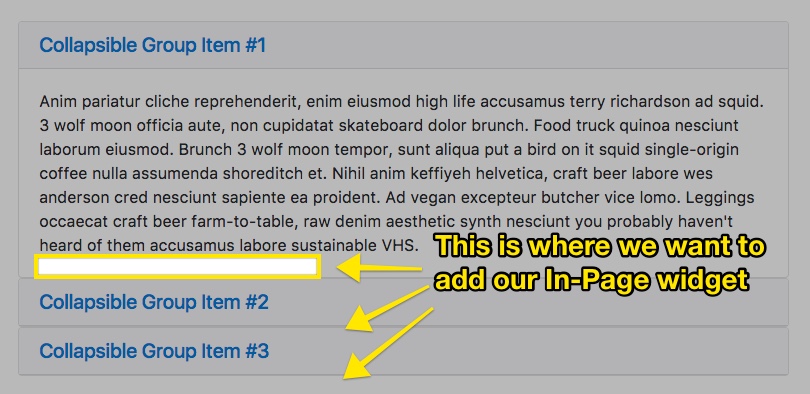
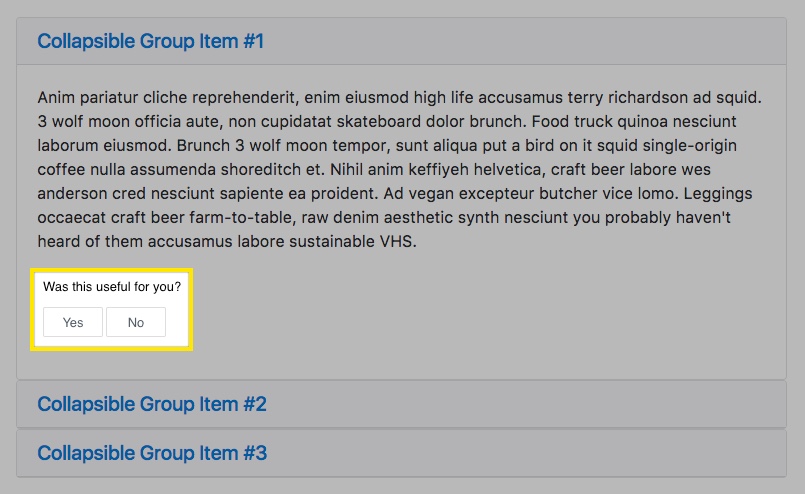
For the sake of this guide, we’ll use the Bootstrap V4 collapse element to mimic adding an In-Page widget to the expandable content of an FAQ page.
The first image shows you what the default expandable looks like without an In-Page widget, the second image shows you where we would like to place the In-Page widget, and the third image shows you what the widget looks like after installation.
Once you’ve figured out where you want to place your In-Page widgets, you’ll create your In-Page widget. Then, you’ll copy the Widget ID from the install page. You can reach the install page by going to the setup page followed up by clicking on the “install” icon for your widget.
If you have your In-Page widget ID, copy it to a text doc. You’ll need to have it ready as we move on to coding.
Code for Multiple Widgets
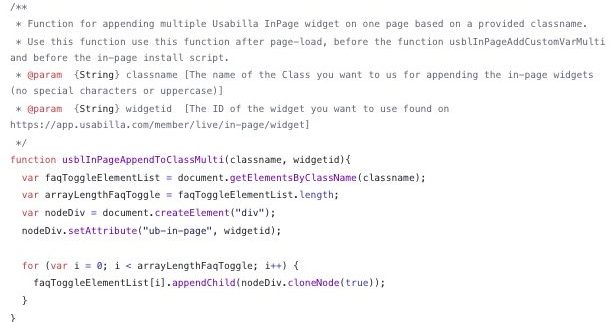
To make this implementation easier, we’ve made two JavaScript functions that you can add to your website. These JavaScript functions each serve a specific purpose and must be used in order for your widget to work properly.
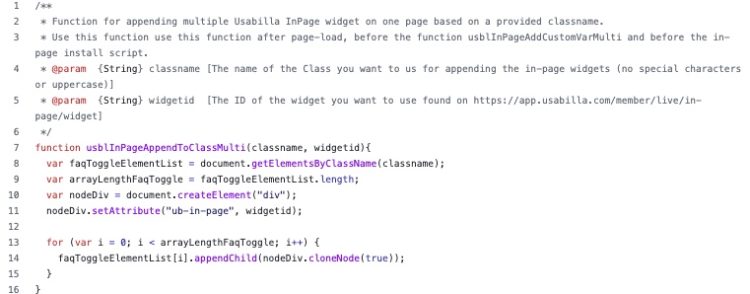
The first JavaScript function, usblInPageAddCustomVarMulti(), requires 2 arguments, being the "classname"* and the "widgetid".
The "classname" refers to the name of the class that should be used by the function for appending the In-Page widgets. Use the class that you use for the content within the expandable content.
The "widgetid" refers to the ID of the In-Page widget that you just created. The widget ID looks something like this “585276d3876927434b237e89”.
The first function automatically creates multiple In-Page Widget codes and adds them to your web page. It does so by counting the number of HTML elements that have the specified classname. Using the number of elements, the function creates a matching number of widgets and appends them to each element with the "classname".
The second JavaScript function also requires 2 parameters: "classnamedata" and the "propertyname". The "classnamedata" refers to the name of the class that the function uses to retrieve the text for your custom variable.

Example
In this example, we’ll be adding 3 In-Page widgets within the expandable section. Then, we’ll add the text of the clickable title as a custom variable to each In-Page widget.
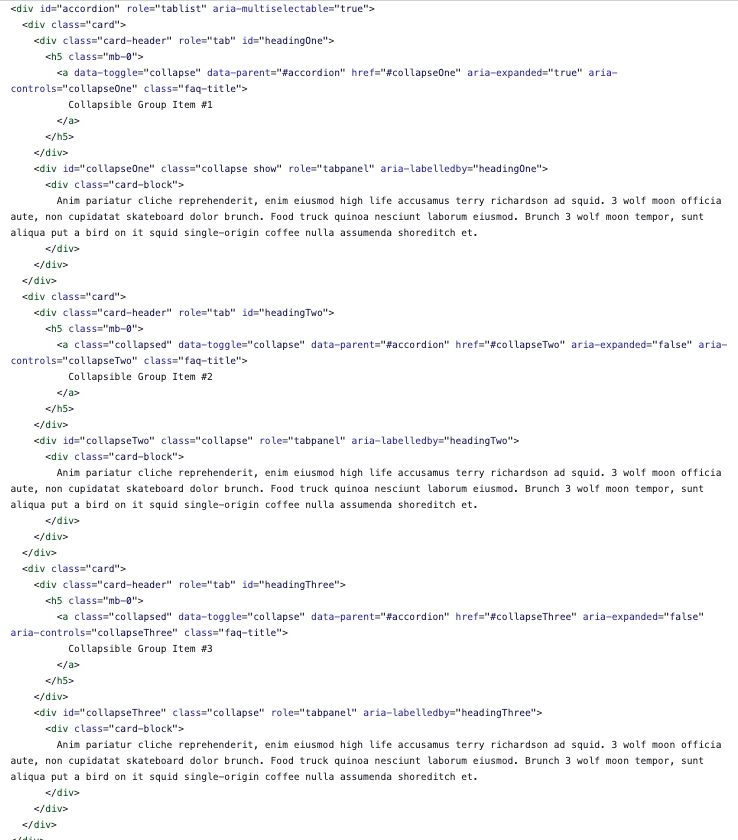
In the code block, below there’s expandable content located in the div with the “card-block” class. We’ll use this class to hold the In-Page widget.
Looking at the HTML, we can see that the text of the clickable title used for expanding the content is an with the class “faq-title”. This is the class that we’ll use for setting the custom variable to make sure you get the right context for feedback.
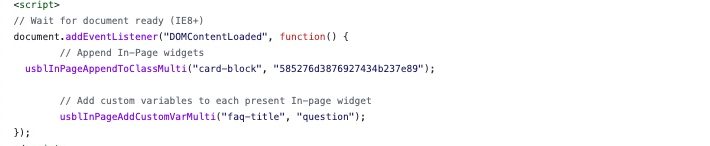
Now, we’ll use JavaScript functions to add the In-Page widgets and custom variables. It’s important that you follow this sequence when running the JavaScript. The sequence is as follows:
- Page loads
- Run usblInPageAppendToClassMulti()
- Run usblInPageAddCustomVarMulti()
- Run In-Page Script snippet (not included in the script example).
As soon as you run the script above you’ll be able to see the In-Page widgets in the HTML when you inspect the page. To illustrate, we’ll take a look at the HTML of our example. In the example, you can see that an In-Page widget has been added to each card-block div element and that each In-Page widget has a custom variable that corresponds to the adjacent title.
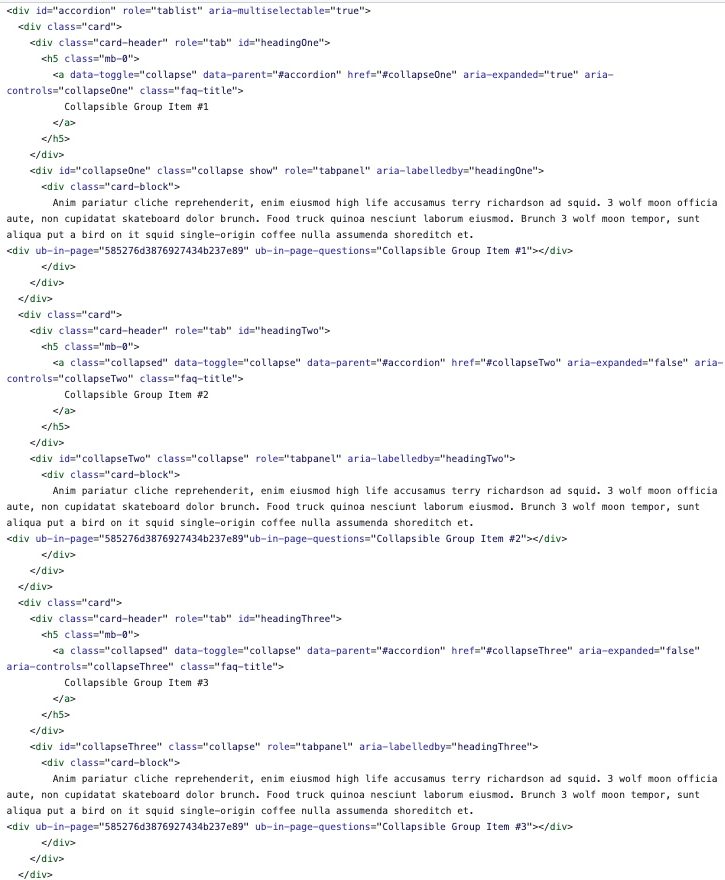
After the In-Page widgets have been added you can run the Script Snippet to load the In-Page widgets. As soon as you run the script you’ll see the In-Page widget load and you can start collecting feedback.
Requirements & Disclaimer
The JavaScript mentioned in this article does not fall under the official GetFeedback Digital Product support and is therefore provided “as is”, without warranty of any kind, express or implied, including but not limited to the warranties of merchantability, fitness for a particular purpose and non-infringement. In no event shall the author be liable for any claim, damages or other liability, whether in an action of contract, tort or otherwise, arising from, out of, or in connection with the software or the use or other dealings.
Embedding app.getfeedback.com Surveys
Using app.getfeedback.com, you can distribute surveys on your website or blog by embedding your survey in a basic iframe. You'll create the URL and code for this iframe, and preview it using the Web Embed builder.
To access this feature in the survey builder, navigate to Distribute > Web Embed.
When building the URL to use in your iframe, we'll start with your survey’s distribution link, without any alterations. Then, as you edit how your survey looks, we'll adjust this URL accordingly.
You can set up an iframe for your draft or live survey, though we only recommend using draft surveys for testing the survey implementation, not for gathering results you’d like to hang on to.
iFrame Branding and Navigation
As you adjust the position of the progress bar, navigation, navigation width, and footer background, your survey URL in the iframe builder will update to reflect these changes.
- Progress Bar: You can place your progress bar at the bottom or top of the survey, or remove it altogether.
- Navigation: You can place the survey navigation at the bottom or top of the survey.
- Navigation width: If you choose an option other than ‘Auto’ for the survey Navigation, three different options for Navigation width will appear.
- Footer Background: A small black bar will appear behind your GetFeedback logo or personalized logo (when branding your survey) by default. You can toggle this option to turn it on and off as needed.
Exporting the iFrame Code
After making your edits, export the iframe code by clicking Export. In the export modal, GetFeedback will prompt you to copy & close or cancel.
In this example, we've set the progress bar to show at the bottom of the survey, the navigation options to show at the top of the survey, and chosen “compact” for the navigation bar width.

To add relative height and width parameters to your iframe. After copying the iframe code, add the parameters for height and width when embedding your iframe on your website or blog.
Previewing your iFrame
The final section in the iframe builder is titled Preview iFrame.
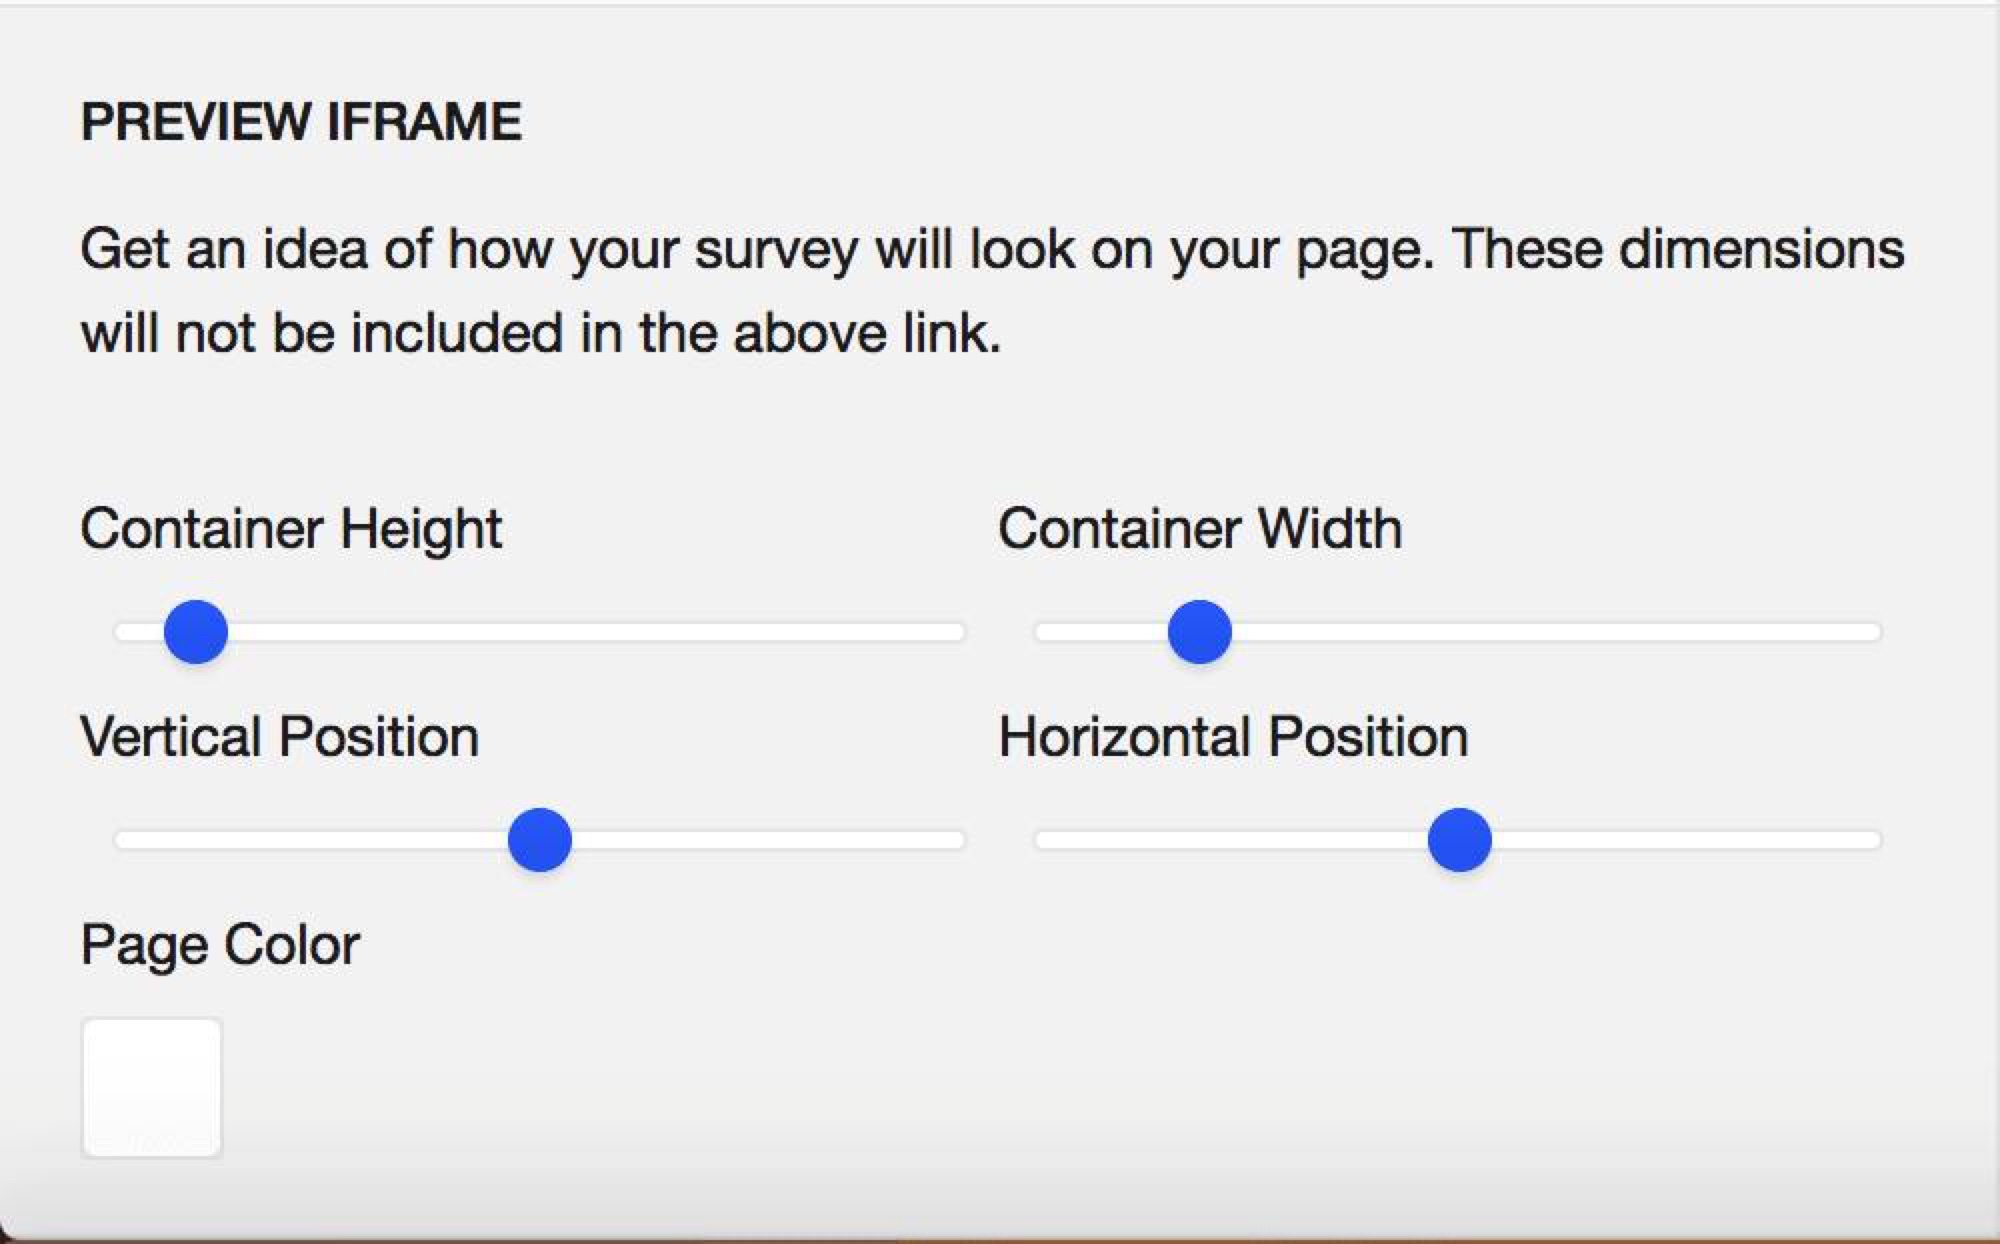
Editing this section of the iframe builder won’t alter your survey URL or code at all. You’ll need to make all survey placement, width, height, and background color adjustments on your own webpage. We offer this preview simply to give you a sense of what your survey might look like on your website.