GetFeedback
Custom Forms
When you implement your GetFeedback Feedback Button on your website, you may want to show different forms to different visitors. For example, you may want to show a different feedback form to your employees or logged-in user. Use custom forms to show a different feedback form based on the URL, Country, IP, or a custom JavaScript API Command. You can also use custom forms to auto-label any incoming feedback based on the form the respondent used.
Creating a Custom Form
Create a custom form for an existing feedback button. If you don’t have one yet, create a feedback button before creating a custom form.
To create a custom form:
- In the Websites section of app.usabilla.com, go to Buttons & Forms and select Setup.
- Find the button to add a custom form to, then select or add a custom form.
- Enter a name for the custom form. You can use alphanumeric characters and underscores.
- Design your form. Learn more
- After creating your form, select Next.
- Customize and save your form. Learn more
Auto-Labeling Based on Custom Forms
Set up auto-labeling to consistently apply labels to feedback across multiple brands and domains.
To add labels to a custom form:
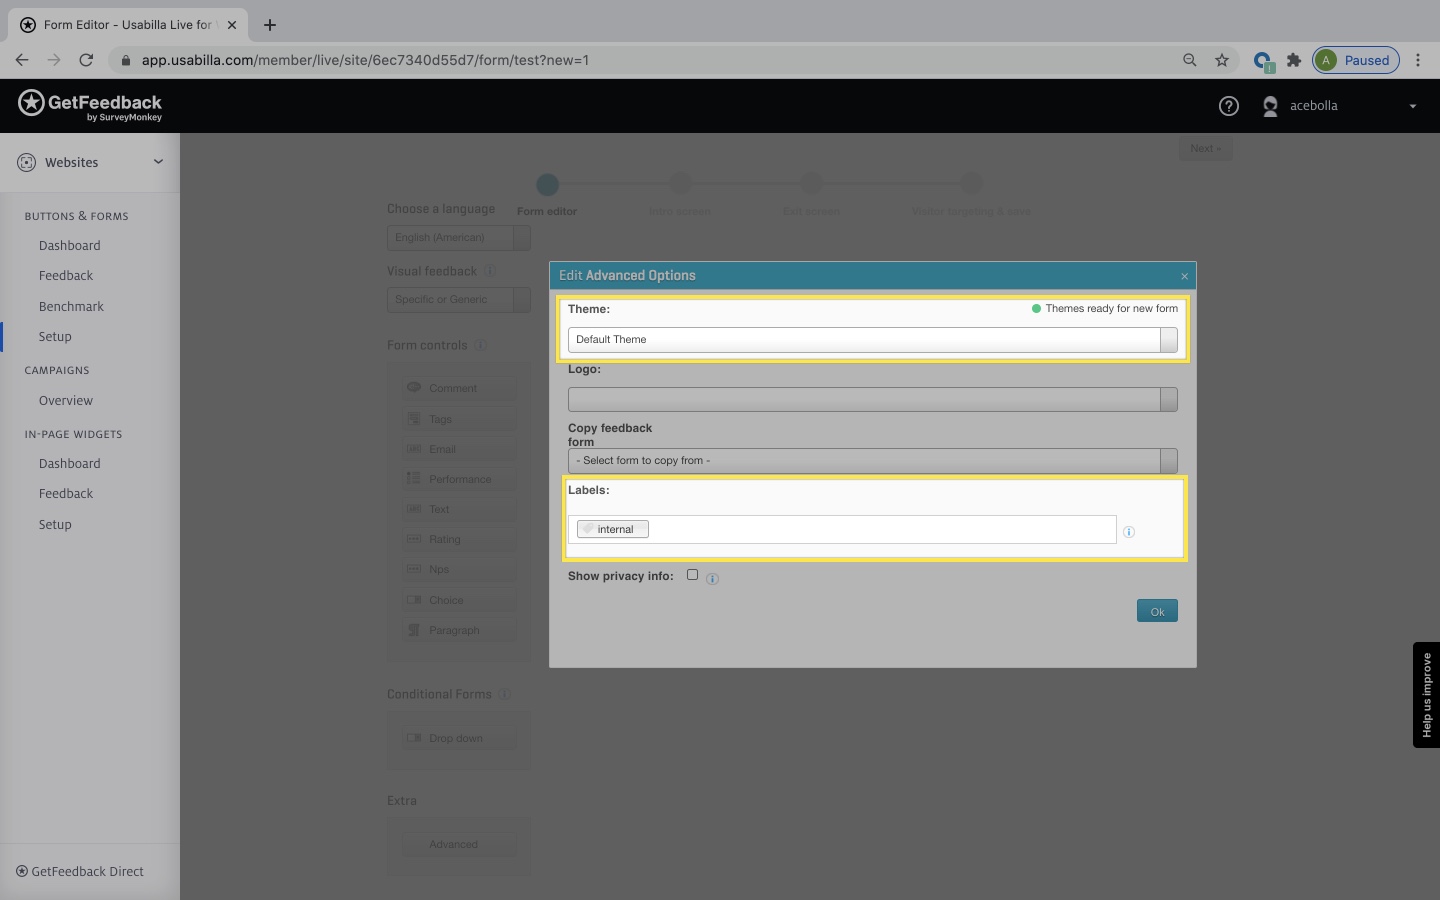
- In the form editor, select Advanced. You may need to scroll.
- In the Labels field, enter the labels to add to feedback left on this form.
- Select Ok.
Continue editing your form. When you save and activate your form, we’ll apply the labels to any feedback sent through this form.
Targeting Specifc Users
In the Visitor Targeting step, you can specify which visitors will see your Custom Form. There are three targeting options available:
- Based on URL or Path
- Based on Country
- Based on IP -address
Targeting URL or Path
Target visitors on pages that match a specific URL or path. To target users on subpages, use a path to target that segment of the URL (example: use website.web/members to target users on pages such as website.web/members/billing).
To target a URL or path:
- Check the box to Show this form when any of these urls/paths match.
- Choose when to target visitors:
- To target visitors when they land on a specific page, select any from the dropdown.
- To target visitors who aren’t on a specific page, select none from the dropdown.
- Enter the URL or path to target.
- Select + on the right to create the rule.
- Set the targeting conditions:
- Match against: Choose to target a path (a URL segment) or the full URL.
- Type: Choose targeting conditions: contains, starts with, ends with, is exactly, or matches regular expression.
- Match string: The section of the URL to target.

In the example above, the custom form will be shown when the user is on:
- https://support.usabilla.com/hc/en-us/articles/208743525-Setting-up-Custom-Forms
If, instead of "any" we would select "none", then this Custom Form would be shown on all website pages except for:
- https://support.usabilla.com/hc/en-us/articles/208743525-Setting-up-Custom-Forms
Targeting based on Country
Show a Custom Form visitors from any or none of the countries you specify. Using this option can help you gather feedback from countries where your organization doesn't operate or where you’re offering different features. We determine a visitor’s location based on their IP address.
To target based on country:
- Check the box to Show this form when the user is from any of these countries.
- Choose when to target visitors:
- To target visitors from a specific country, select any from the dropdown.
- To target visitors who aren’t from a specific country, select none from the dropdown.
- Enter or select the countries to target.
Targeting IP Addresses
Show a Custom Form when any or non of the specified IPs match. You can use several notations when specifying IP addresses.
To target based on IP address:
- Check the box to Show this form when any of these IPs match.
- Choose when to target visitors:
- To target visitors from a specific IP address, select any from the dropdown.
- To target visitors who don’t match an IP address, select none from the dropdown.
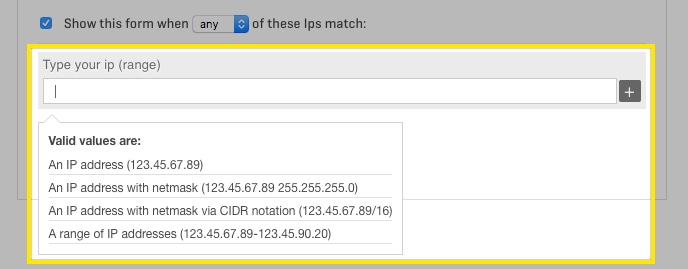
- Enter the IP address to target. You can target certain values:
- A specific IP address (Example: 123.45.67.89)
- An IP address with netmask (Example: 123.45.67.89 255.255.255.0)
- An IP address with netmask via CIDR notation (Example: 123.45.67.89/16)
- A range of IP addresses (Example: 123.45.67.89-123.45.90.20)
Saving and Activating the Form
Once you set up your targeting options, you can finish creating your custom form by saving it.
- Save: Save your Custom Form without showing it to visitors.
- Save and Activate: Save your Custom Form and show it to visitors who match targeting conditions.
To activate a custom form later, select Setup under Buttons & Forms. Then, toggle on the custom form.
Setting Custom Forms using JavaScript
Using the GetFeedback JavaScript API Command, you can set a specific cCustom fForm based on your own logic. You could, for example, show a custom form based on:
- The current time
- The user's login status
- The number of website visits
- The browser
- The OS
- The custom button the user clicked
To set custom forms based on a JavaScript API command:
- Add your feedback button to your site and create your custom form.
- Use the setForm JavaScript API command to set your custom form. The setForm command uses the name of your custom form as the argument to decide which form to load.
window.usabilla_live("setForm", "Enter the exact custom form name here"); - Add your own JavaScript using a Self-Invoking Function that you initialize as soon as your website and the feedback button are loaded. Alternatively, you could use the logic provided by your tag manager trigger rules with the setForm command being initialized in a separate tag.
You can add the JavaScript to your website using any method that works for you. You can either upload the JavaScript to your website or you can add it to for example using your tag manager.
The example below shows three different buttons that show different custom forms based on the button the respondent selects:

Auto Labeling with Custom Forms
Automatically apply labels to responses sent through custom forms. You can use multiple custom forms across different brands, products, or demographics. Using automatic labeling makes it easier to manage, segment, and analyze feedback across your custom forms.
Example: PuppyLove is a large national enterprise that has multiple subsidiaries. Each of the 8 subsidiaries offers the same product and acts as a competitor brand within the PuppyLove group. All 8 websites of the subsidiaries are developed by the same development team and are structured in a similar way, but they are styled differently to appeal to different demographics. PuppyLove wants to align the labels applied to all incoming feedback to make it easy for management, developers, marketers, or product owners to quickly see all feedback from a certain part of the website across all subsidiaries.
Because each of the subsidiaries tries to target their own demographic, PuppyLove uses multiple feedback buttons and custom forms for each subsidiary. PuppyLove decides to label based on the customer type, product type, and interaction type. Based on their sitemap, that provided them with an instant overview of the website structure, they started with the following rules:
- /business: Label all B2B pages feedback with "business"
- /consumer: Label all B2C pages feedback with "consumer"
- /service: Label all customer service pages feedback with "service"
- /product: Label all product pages feedback with "product"
Learn how to set up auto labeling