GetFeedback
Webhooks Integration
Our webhook integration helps you push web, app, email, chat and SMS responses to your third-party tool of choice. Webhooks are ideal for customers who want to compare or share feedback data in programs like Tableau, Power BI, Zendesk, Hubspot, Slack, Microsoft Teams, etc.
Getting started with webhooks
From Insights, select Automations then New Automation. Give your automation a unique name then select Webhook.
Click Continue to Data to move to the next page.
Selecting your data
On the next page, you can select all the forms, campaigns or widgets you'd like to include in the integration. This data will be pushed to your 3rd party tool.
When you're satisfied, click Continue to Conditions.
Defining conditions
Here, you can set up conditions to choose when data should be pushed to your 3rd party tool. You can push data after every feedback item or specify the conditions when data should be pushed.
In the Data source drop-down, there are 3 options:
- an answer: if you'd like to push the data based on an answer your user gave to a question in your form/survey/widget
- a custom variable: if you're collecting custom variables from your data layer and would like to push the data based on one of those
- a URL: URL's are collected by default on our end and you can push data based on specific ones as well
‘An answer’ or ‘a custom variable’ options include an additional field:
- an answer - choose from all questions in your form/survey/widget
- a custom variable - add the name of the variable(s) you want to use
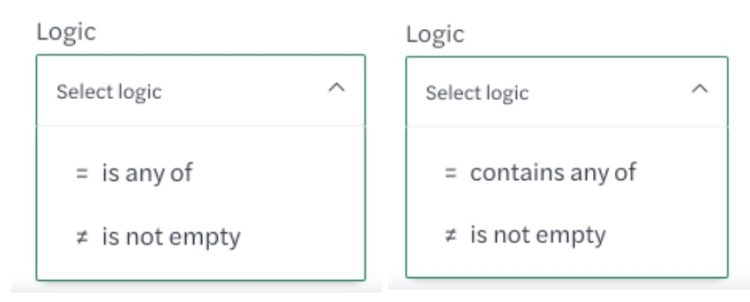
Next, choose your logic operators:

If you selected ‘an answer’, you’ll set values for each question chosen.
| Question Type | Value Type |
| Mood rating | 1 - 5 scale, emoji faces |
| NPS | 0 - 10 scale |
| Rating Element | 1 - 5 scale |
| Open Text field | Keyword entry field |
| Single and multiple choice questions | Dropdown |
Defining the details
After selecting your data and defining conditions, you'll enter a destination URL. You’ll get this URL from the app or website you want to send data.
You'll also enter a destination title. This should be something easy to recognize, for example, JIRA App Team Backlog.
You can (optionally) add a description to your webhook. This description will not be pushed to the destination URL.
Finally, click 'Save' and your Automation is now created and is available on the 'Automations' page.