GetFeedback
Jira Integration
Our Jira integration lets you automatically or manually push feedback items to a specific project. This means you can easily push bugs or feature requests identified by your users to the teams responsible for solving them. You can send feedback to both business and software projects in Jira.
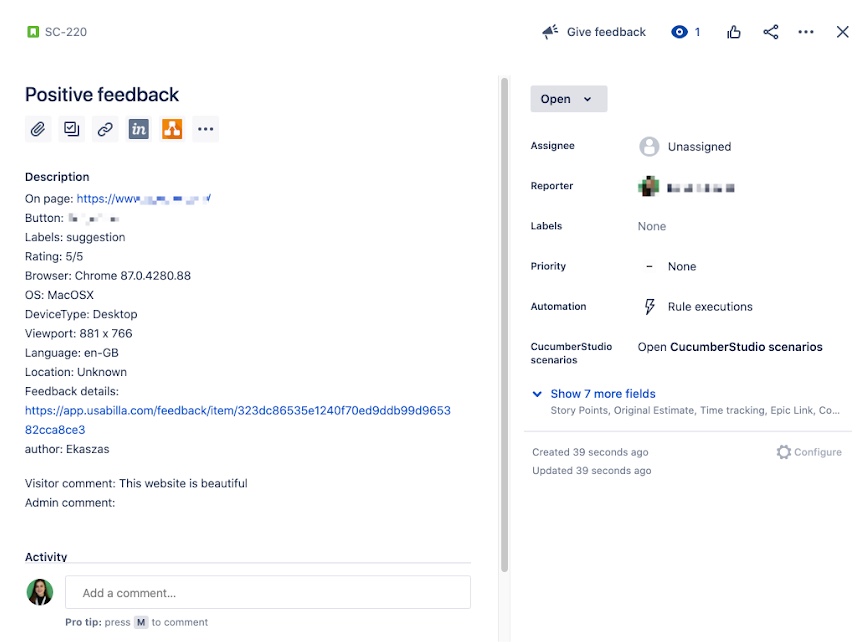
The image below shows what a feedback item might look like as a ticket in Jira.
Requesting an Atlassian API token
Create and copy an API token from your Atlassian account. You’ll need the API token when setting up the integration in GetFeedback.
Setting up the Jira Integration
To set up the Jira Cloud integration in GetFeedback:
- In app.usabilla.com, select your username in the bottom left corner, then select Account Settings.
- Select the Integrations tab.
- Select the Jira logo.
- Set up the integration:
- Button: Select the web button to integrate with Jira.
- Push Feedback: Choose when to send feedback to Jira:
- Automatically when feedback includes an email address
- Automatically when feedback has a comment
- Automatically when feedback has either an email address or a comment
- All feedback items
- Manually
- Subdomain: Your Atlassian account’s subdomain (it’s the part before “.atlassian.net”).
- If you’re using a self-hosted/on-prem Jira instance, select I want to use a self hosted app, then enter the full URL of your Jira instance.
- Token Access: Select our tool, then enter the following information:
- Username: Your Atlassian username.
- Password: The API token you requested. Don’t use your account password.
- Issue Type: The type of issue to create when you push feedback to Jira. You can use any of the issue types in your Jira account.
- Project Key: The Jira project key to use.
- Enable: Check the box to enable the integration when you save it.
- Select Save.
Turning the Integration On or Off
If you didn’t enable the integration, you can turn it on at any time. If you want to stop sending feedback to Jira, you can disable the integration at any time.
To enable or disable the integration:
- From app.usabilla.com, select your username in the bottom left corner, then select Account Settings.
- Select the Integrations tab.
- Scroll to the Jira integrations section, then select the integration to edit.
- To enable the integration, check the Enable box.
- To disable the integration, uncheck the Enable box.
- Select Save.
Manually Pushing Feedback to Jira
If you select manual push, you can send feedback to Jira from the feedback item. You can push a feedback item to Jira once.
To manually push feedback to Jira:
- Select Feedback under Buttons & Forms.
- Select the feedback item to push to Jira.
- Select Jira at the bottom right of the ticket.
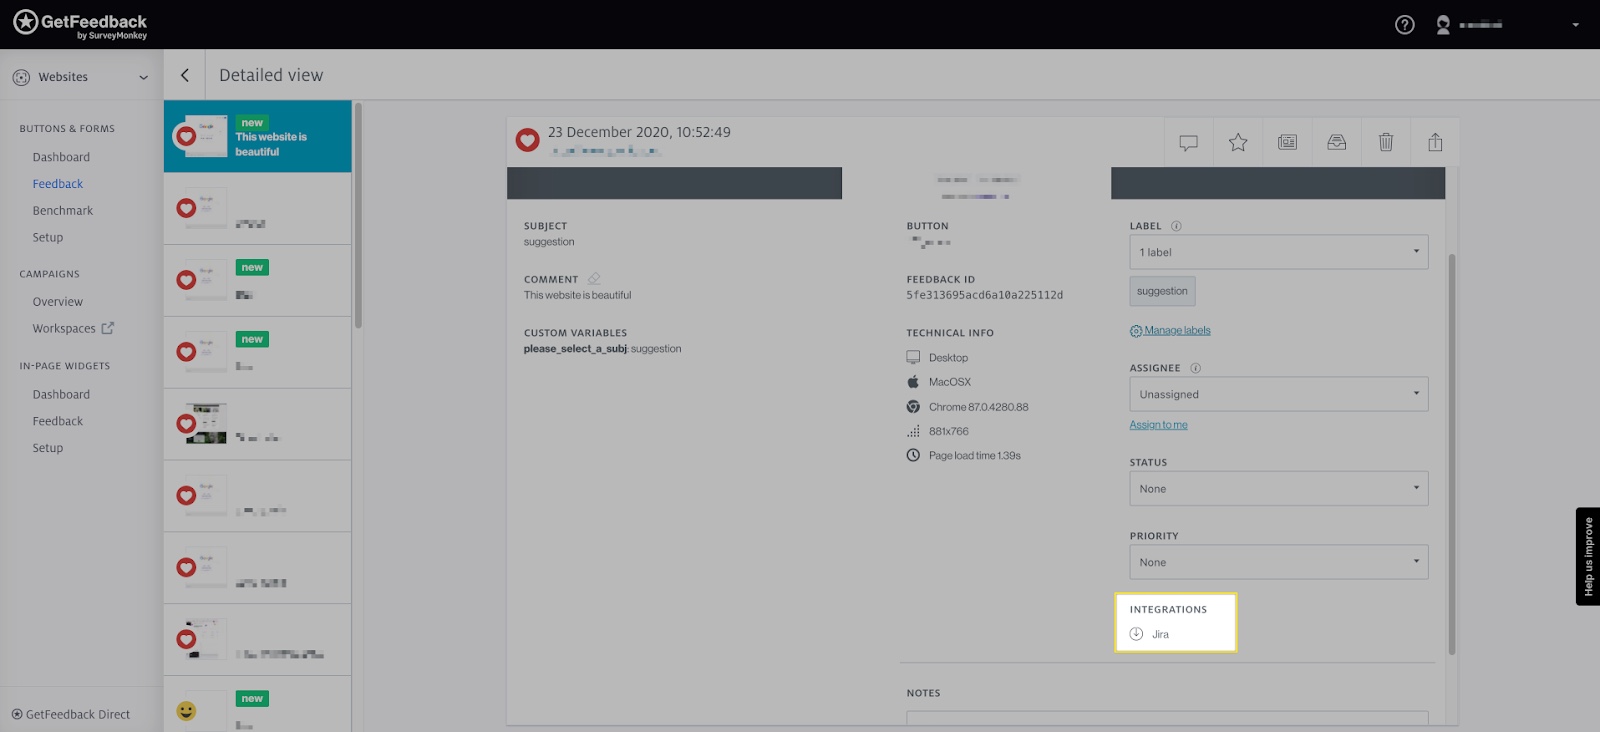
Once you push feedback to Jira, a green check mark displays on the feedback item.
Integrating with Jira On-premise/Self-hosted Instances
If you're using Jira on-premise, you'll need to provide access to the GetFeedback servers to use the integration. In many cases, your JIRA on-premise instance is only available when you are connected to the company network from the office or by using the company VPN.
To connect GetFeedback to your on-prem Jira instance, you'll need to allowlist the 3 GetFeedback server IP addresses on the GetFeedback Digital Server. You'll likely need to contact your network administrator to have these IP addresses allowlisted. Please contact GetFeedback for the exact IP addresses and Ports that need to be allowlisted.