Apply
How to Save/Manage Custom Filters
Filters are used to retrieve relevant data from your SurveyMonkey Apply site and are commonly applied within the Manage Users and Manage Applications pages. This article is dedicated to saving and managing custom filters that are frequently used by administrators of your site to monitor the progress of applicants and programs.
How to Save Custom Filters
If a filter will be used often it can be saved so that it can be applied without having to be rebuilt from scratch every time a user returns to the page.
To save a custom filter within Manage Users or Manage Applications:
- Apply the custom filter.
- Select Save.
- Apply a name for your filter.
- Select OK.
How to Apply Saved Custom Filters
To apply a saved filter:
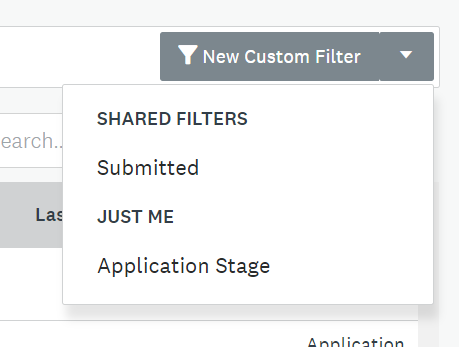
- Select the New Custom Filter dropdown menu.
- Select one of the available filters.
How to Edit Saved Custom Filters
Editing a Custom Filter that has been saved does not extend past the ability to rename the filter. Any additional filters added to an existing saved filter can be saved again, but will not overwrite the original filter. If additions to an existing filter are needed simply add and/or remove components of the filter and save the filter with a new name. You can then delete any unwanted filters individually.
How to Rename a Filter
- Select the Custom Filter dropdown.
- Place your cursor over the filter to reveal the More Options icon.
- Select More Options.
- Select Rename.
- Rename the filter and select OK.
Custom filters that have been saved can be shared with other administrators in the site from the Manage Applications screen. When a filter has been shared by an administrator, the filter will appear in the Custom Filter list under Shared Filters.
To share a custom filter:
- Select the Custom Filter dropdown.
- Hover your cursor over the filter to reveal the More Options icon.
- Select More Options.
- Select Share.
- Click Yes to confirm you would like to share the filter with other administrators.

To stop sharing a custom filter:
- Select the Custom Filter dropdown.
- Hover your cursor over the filter to reveal the More Options icon.
- Select More Options.
- Select Unshare.
- Click Yes to confirm you would like to stop sharing the filter with other administrators.
How to Delete Saved Custom Filters
When a filter is no longer needed it can be removed to reduce clutter from your view. Saved Custom Filters must be deleted by the user who created them and will not be removed from the Shared Filters list until the creator of the filter deletes or un-shares the filter.
To delete a Saved Custom Filter:
- Select the Custom Filter dropdown.
- Hover your cursor over the filter to reveal the More Options icon.
- Select More Options.
- Select Delete.
- Click Yes to confirm you would like to stop sharing the filter with other administrators.