Apply
How to Authenticate your Custom Email Sender Address
If DKIM Email Authentication hasn't been enabled on your site yet, contact our support team for more information. To determine if this has been enabled, the default No Reply email visible in your settings should be noreply@mail.smapply.net. If it isn't noreply@mail.smapply.net, please contact our support team.
Advantages of Authenticating your Email
Currently, when you send emails from SurveyMonkey Apply they are being sent from the smapply.io email address. By authenticating your custom email sender address, emails will be sent from your organization's email address. As your email address is more likely to be recognized by your applicants and reviewers, your email is more likely to be received and not get caught in spam filters.
Email Authentication: Overview
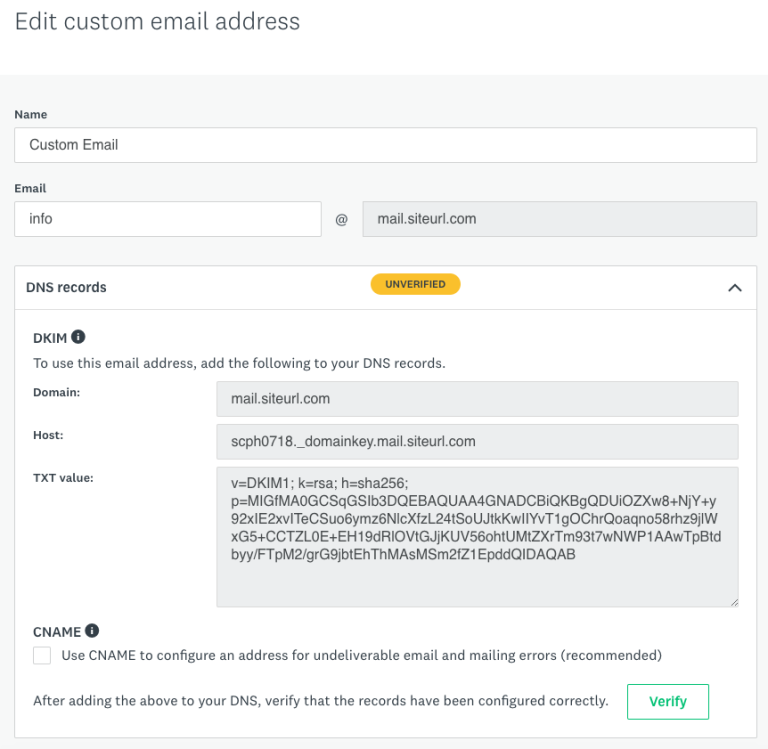
Email Authentication uses two DNS records to verify that we can send emails on behalf of your domain. The first, DKIM, uses a TXT Record to validate the email address and is required to use the custom email address on the site. Without a verified DKIM you will not be able to select your custom email address from the list of email addresses and it will be marked as unverified.
The second record is a CNAME and is only required if you want the Return-Path header to align with your sender email address. The CNAME should be added for the subdomain that you have configured your custom email address to use. For example, if your sender email address is apply@mail.siteurl.com, the CNAME record should be created for mail.siteurl.com with the value shown in the Value field, which will mark the Return-Path as also mail.siteurl.com. While this isn’t required, it is a best practice to enable this as some receiving mail servers may check the Return-Path to see if the sender’s domain matches the Return-Path domain in an effort to prevent phishing.
Once you have added the DNS records, click Verify to verify the email address. The system will verify that the records exist on the domain, and if they are valid, a verified icon will appear on the DNS Records section as well as under the Verification Status column on the Email Settings page.
What to do if you're not sure what to do
When attempting to set up this process, it is highly recommended to send this information to your IT department/individual to assist you with updating your email domain settings. If your organization doesn't have someone knowledgeable in configuring DKIM or you just aren't able to make changes to your email settings, we would not recommend using a Custom Email Sender.
Instead, it is best to use the system's default email address noreply@mail.smapply.net. You can, however, update the name that the email is received from. In the Email settings of your site instead of it being "SurveyMonkey Apply" <noreply@mail.smapply.net> you can set it up as "Your Organization Name" <noreply@mail.smapply.net> so that your recipients still know the email is coming from you.
How to Enable Email Authentication
To enable Email Authentication if this functionality isn't available, please contact our support team.
How to Configure Email Authentication
Before you Start
When adding a Custom Email Address to a site with Email Authentication enabled, it is recommended that you use a subdomain for the email address as this will allow you to align the Return-Path field with your domain as well. While this helps to improve email deliverability by having the return-path email address match the domain of the sender address, unfortunately, it will also mean that you can’t use a real email address as your Custom Email Address since a CNAME would affect access to your real organization’s site.
If you wish to use a real email address to configure Email Authentication you can, however, you will not be able to configure the CNAME and emails sent from your site will have the default return-path used instead.
Configuration
To use Email Authentication:
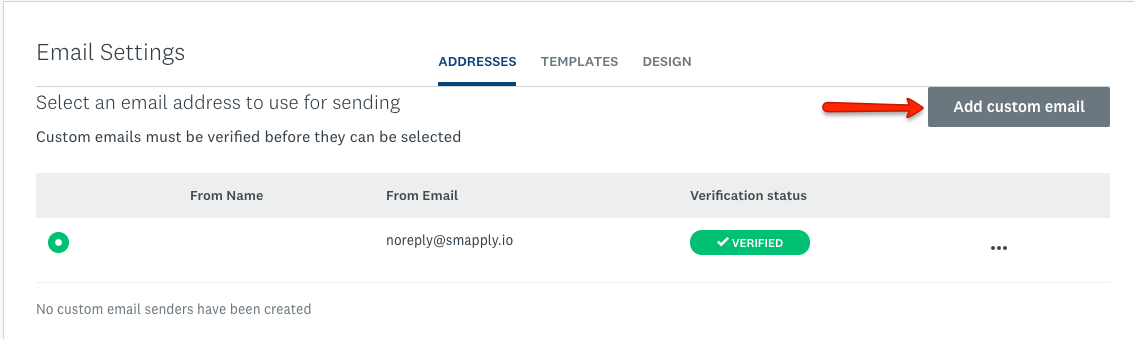
- Click Add Custom Email on the Email Settings page
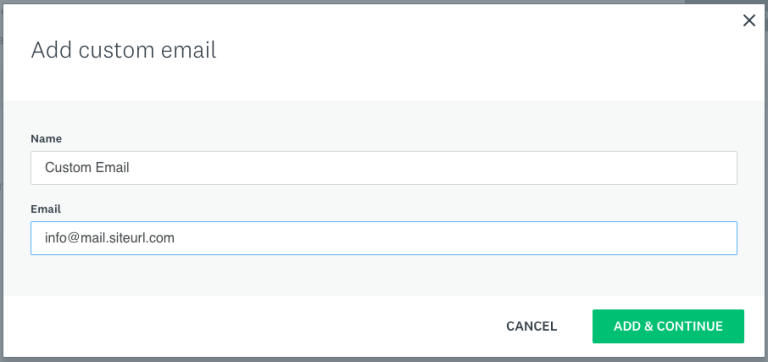
- Enter your custom email address as well as a name for it and click Add & Continue
- The next step requires administrative access to your domain name to add the required DNS records. The Edit custom email address box will be shown and includes the values for the DKIM and CNAME records that should be added to authenticate the email address. The DKIM record is required, while the CNAME is optional if you wish to align your Return-Path email address with your sender address.