Apply
Automations: Actions (“DO”)
The DO statement is comprised of the actions that will occur when the automation is activated (WHEN statement) and the rules have been satisfied (Condition). These actions can include sending an email, moving an application to another stage, adding a label to an application, among others. The DO statement is the final piece required to complete the setup of an automation.
Automation Actions ("DO")
Overview
Actions cannot be selected unless the activation of the automation has been set as the actions available are dependent on the activation selected. An automation can perform multiple actions, but a minimum of one action must be provided in order to save your progress.
NOTE: Automations will not fire unless it has been activated.
| Component | Description |
| Action | Actions to occur when the automation fires successfully. |
| Item | The specifics of the action that will be enforced. Examples: the label added to the application, the stage the application is moved to. This field is not applicable to certain actions. |
| Value | The value to be applied when the action occurs. This field is only applicable to custom field actions. |
WARNING! If an action is not available, it is usually due to the activation selection made earlier in the automation setup. Changing the source of the WHEN statement will result in clearing ALL rules in the Condition AND all actions listed in the DO statement. If the activation is changed and the automation is saved, these rules and actions cannot be restored.
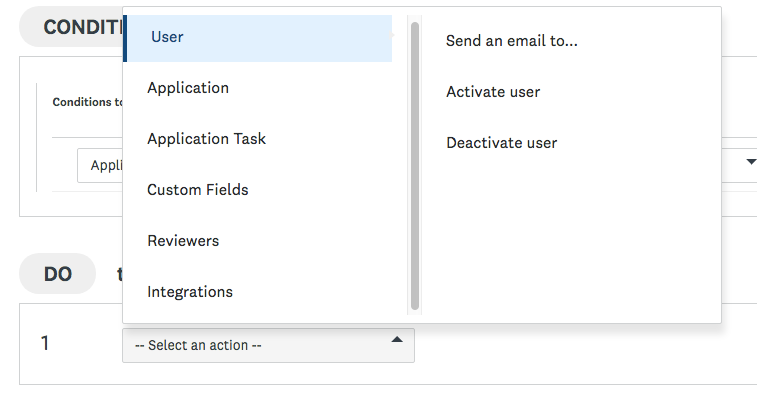
The Action Menu
A dropdown menu is used to select the actions that the automation will perform. The menu is entered when the -- Select an action -- dropdown arrow or title is selected. This menu is similar to the menu used to set the activation of your automation and consists of a Source menu on the left and an Event menu on the right.
How to Add Actions
An automation must have a minimum of one action to perform when the activation and conditions are met. When building the automation an automation will need to be present before being able to save your WHEN statement or Conditions.
To add the first action:
- Select the -- Select an action -- dropdown menu
- Select the Source from the left menu
- Select the Event from the right menu
- Select any attributes required to complete the action such as the stage the application will move to, the label that will be applied, the
- Save the automation.
This process can be followed to add all actions, but may not cover the attributes required for some available actions. See How to Send an Automated Email and How to Automatically Apply a Custom Field Value for the steps required to add these advanced actions.
To add additional actions:
- Select Add (plus sign) to display another action to configure
- Select -- Select an action -- and configure the new action
- Repeat as required
Ordering Actions in a Single Automation
The order of actions should be listed in the order the actions should occur. When an automation is activated and the conditions are validated, actions will commence starting with the action in position 1.
To provide an example of how this order can affect your process, assume the following actions are performed by a single automation and are listed in the following order:
- Add label to application
Value: Secondary Application - Remove all labels from application
The purpose of this automation is to update the application label to reflect that this is not the first application the applicant has submitted. With this order, the label is applied but then immediately removed. This means that the application is updated, but the label does not remain on the application. To resolve this the order should be listed as follows:
- Remove all labels from application
- Add label to application
Value: Secondary Application