Apply
Data Exports
Data Exports present data from forms, tasks, metadata, and databases connected to your program. Use to pull a report from your raw data of the site. For example, you can create a report that compiles applicant entered geographic and demographic information and includes specific answers from your application forms.
How to Create a Basic Export
To create a new report on the site:
- Click Reports
- Go to Data Exports
- Click + Create in the top right-hand corner
- Give your report a name
- Under the Reports title, select the type of Data to include
- Select a program source, you may only select one
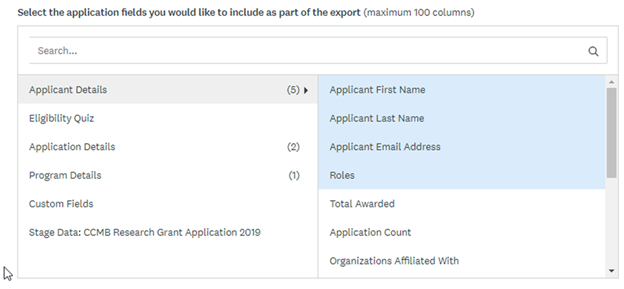
- Select the data fields you would like to include as part of the export. Note: There is a limit of 100 columns

8. Click Save or Save & Export to immediately pull the information.
How to Pull an Existing Export
Once a Data Export is created it can be reused at any point in time. If you ever need to pull another copy of the Export:
- On the right-hand side of the Data Exports name, click the three dots.
- Select Export Data.
- Select CSV or Xlsx for the file type.
- Click
How to Edit your Export Name
At times you may find the need to repurpose old reports, to ensure the title still applies you have the option to change its title. To edit your report name and description:
- On the right-hand side of the report, name Click the three dots
- Select Edit your report
- Click the title in the top left-hand corner
- Make the desired update
- Click Save
How to Add or Remove Columns to Your Export
The columns available in your Basic Report will depend on the source you chose while creating your report. When the report is created there will be default Columns available to provide basic information relating to the Source. For example, for Submissions Reports the defaults will include submission title, stage, status, etc. However, Rankings Reports will include the submission title, cumulative ranking, average rankings, etc.
To add more columns of data to your report
- Either by using the search feature or manually navigating using the tool to find the desired data
- Within the piping selection, select an option from the left-hand column List Note: This will include a list of Basic Fields, as well as forms applicable to the selected Source.
- Within the piping selection, select an option from the left-hand column List
- NOTE: This will include a list of Basic Fields, as well as forms applicable to the selected Source.
- Once an option on the Left list is selected more options related to this selection will appear within the right list.
- Select all applicable columns you wish to add to your report.
- Click Done
To remove columns of data from your export
- Locate the column you wish to remove from the list of existing columns
- Click the X shown on the right-hand side of the row for that value
- Click Save.
How to Filter Your Data Export
Filters refine your data export by only pulling results that match the criteria you've entered. This will allow you to pull relevant information easily and efficiently.
To add a filter to your Data Export:
- Click the Select a filter dropdown.
- From the General or Variable side on the left, choose a source.
Note: The options on the left side are determined by the type of data used to create the export. - Select a dataset on the right.
- Complete the remaining fields.
- Click the + icon to add another condition to your criteria.