Apply
How to Create a Salesforce v4 Automation
This article applies to our Salesforce V4 integration. If you aren't currently on V4, please see our Salesforce V3 section.
Salesforce Automations: Overview
Salesforce Automations allow you to customize the conditions of when your data will be synced between SurveyMonkey Apply and Salesforce. The way you configure your automation will change what type of information can be synced.

| Column | Description |
| # | ID of the element This is a unique ID of the automation and can be useful for troubleshooting purposes |
| Title | The name of the automation |
| Direction | Identifies whether the action is a Push or Pull of data |
| Status | Identifies if your automation is Active or Inactive |
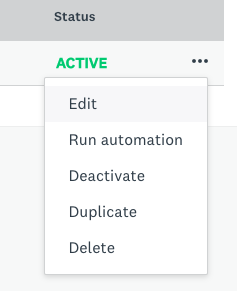
| Ellipsis | When Automation is Active: - Edit - Run automation - Deactivate - Duplicate - Delete When Automation is Inactive: - Edit - Activate - Delete |
Creating the Salesforce Automation
When creating an Automation you will first need to decide what type of information you'd like to sync:
User Account Information
To get started with creating your Automation to sync user account information:
- Access your Salesforce Integration
- Click on Add an SF Automation
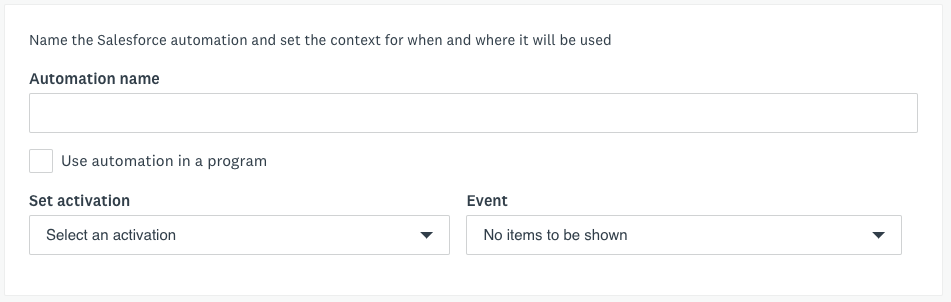
- Create a Name for your Automation
- Select the Event to trigger the Automation. These events will only be User related based on an aspect of their account being updated
- Optional: Add a Condition to the automation to determine which users to push data for
- Select the Mapping Action. If you don't have any Actions created see How to Create a Mapping Action
- Activate your automation
- Save
Information Generic to All Programs
To sync information that is applicable for all programs, such as Application ID, or Created and Submitted Dates:
- Access your Salesforce Integration
- Click on Add an SF Automation
- Create a Name for your Automation
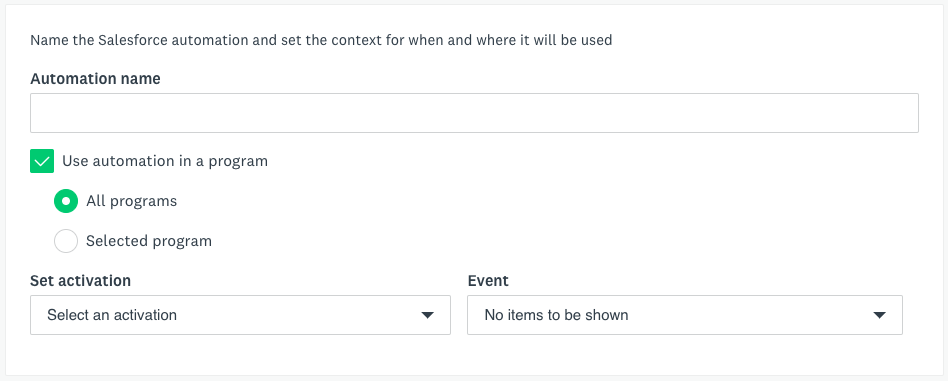
- Enable Use automation in a Program
- Ensure All Programs is selected
- Set the Activation: Application or Decision
- Select the Event to trigger the Automation
This will vary depending on the Activation you selected. - Optional: Add a Condition to the automation to determine which users to push data for
- Select the Mapping Action. If you don't have any Actions created see How to Create a Mapping Action
- Activate your automation
- Save
Information specific to a single Program (incl. Form Responses)
f you wish to sync information that is specific to a program, for example, form responses:
- Access your Salesforce Integration
- Click on Add an SF Automation
- Create a Name for your Automation
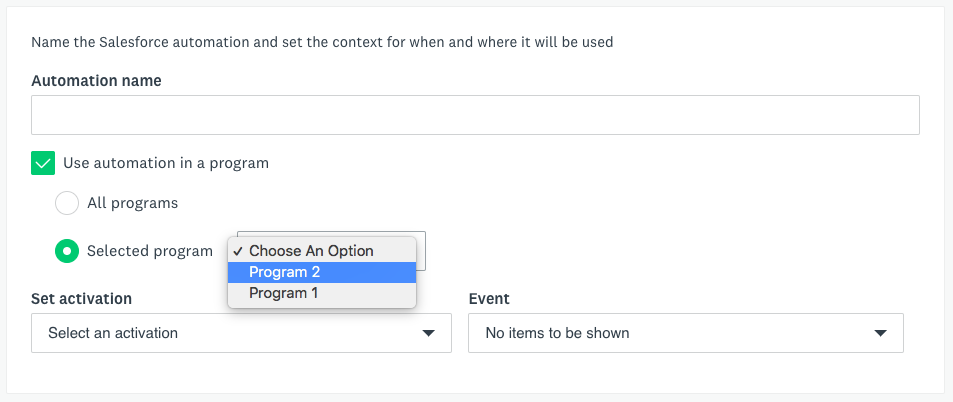
- Enable Use automation in a Program
- Choose Selected Programs
- Select the program to sync the information for
- Set the Activation: Application, Application Task, Decision, Recommendation, Review
- Select the Event to trigger the Automation. This will vary depending on the Activation you selected. Depending on the Activation you select you can set the Target to the specific Task
- Optional: Add a Condition to the automation to determine which application to push data for
- Select the Mapping Action. If you don't have any Actions created see How to Create a Mapping Action
- Activate your automation
- Save
Automation Conditions
Conditions are used to further isolate which applications will meet the prerequisites of the Salesforce automation. A variety of conditions can be added, including (not limited to):
- application form responses
- application status
- application stage
- task completion
TIP! The conditions that are available will vary depending on the type of information you are looking to sync.
Running the Salesforce Automation
Sometimes the Salesforce integration isn’t added to the Apply site until after some Apply records/data have already been created. If this is the case:
- Access your Salesforce Integration
- Click on the Ellipsis icon next to the Active Automation
- Select Run Automation
When doing so, the conditions within the automation will still be checked. Depending on the source of data on each mapping action in the automation, different data will be used. For example, if the mapping action in the automation pushes application, then we’ll use all the active applications. If the source is a user, we'll use the users from that site.